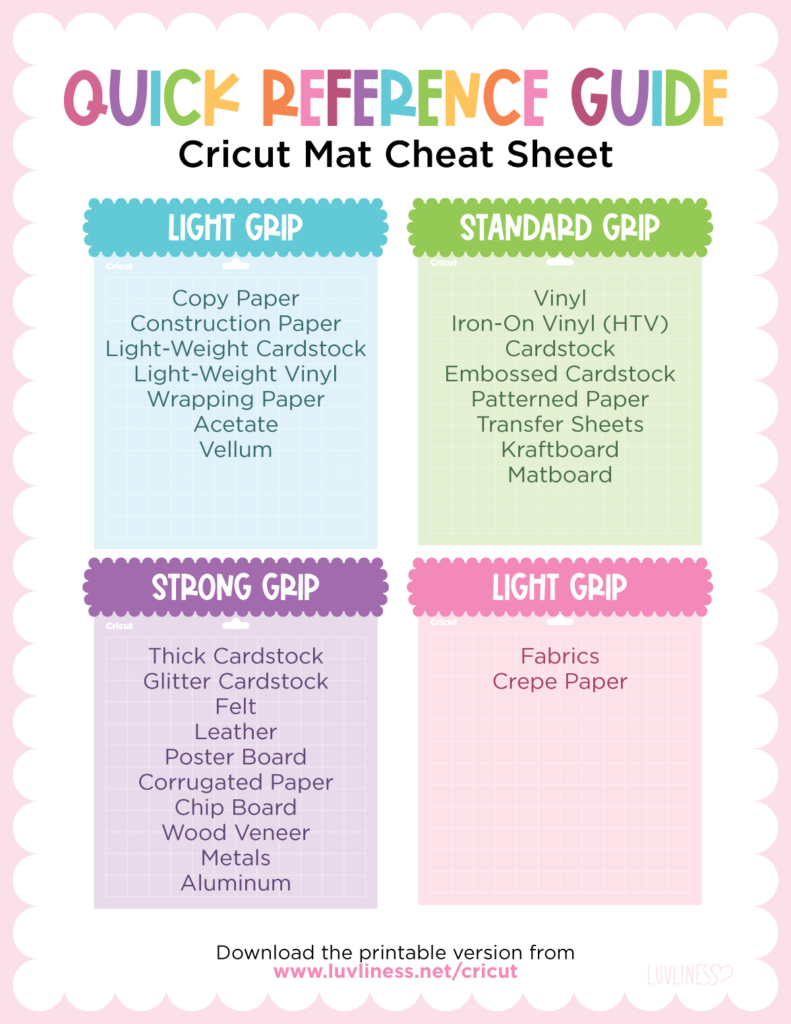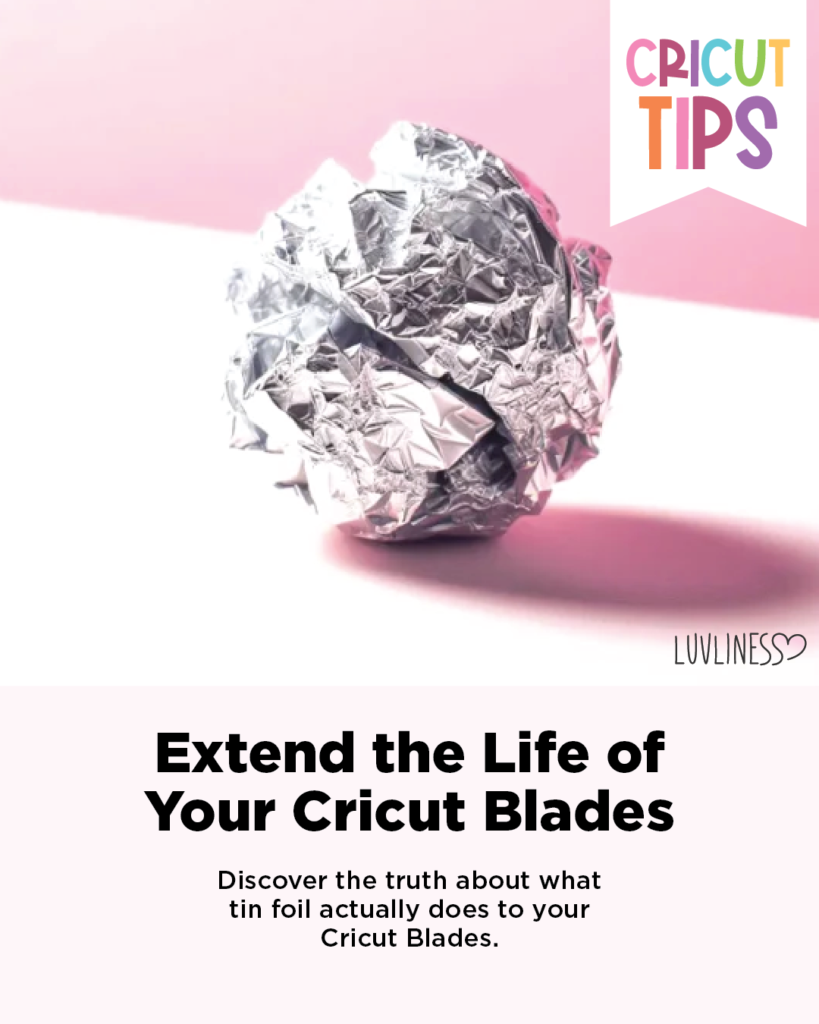

Let’s face it – if you own a Cricut machine, you know there’s tons of accessories you need to purchase in order for your creative-self to truly shine. We’re talking mats, and blades, and pens, and tools, and supplies to cut or engrave. One of the ways to try to minimize your costs is to take care of and regularly clean your tools. Today, I’m going to talk about how we can extend the life of your Cricut blades with a simple, yet useful, household item: Aluminum Foil.
Contrary to popular belief, aluminum foil will not actually sharpen your Cricut blade. So one would think to ask, why do so many Cricut crafters swear by it? Simply because when you use aluminum foil on your Cricut blade, it creates a temporary cleaning effect by removing residual adhesive and paper particles that can accumulate during cutting. While this may give the appearance of a sharper blade, it doesn’t actually sharpen the blade itself. The improved performance observed by crafters is often a result of the cleaner blade making cleaner cuts rather than a true sharpening process.
Other Ways to Care for Your Cricut Blades
Taking proper care of your Cricut blades is essential to ensure optimal performance and longevity. Here are some tips to help you maintain and extend the life of your Cricut blades:
1. Use the Right Materials
Use the appropriate cutting materials as recommended by Cricut for your specific blade. Avoid cutting materials that are too thick, rigid or contain excessive adhesives as these can cause premature dulling or damage to the blade.
2. Clean the Blade & Housing Regularly
After each use (or perhaps once per week, depending on how frequently you use your machine), clean the blade with a soft brush or microfiber cloth to remove any residue material buildup. This is especially important when working with adhesive-backed materials such as stickers or vinyl as they can leave residue on the blade. You could also periodically check and clean the blade housing to ensure smooth movement. Remove any debris or buildup that may affect the blade’s performance using a microfiber or lint-free cloth.
3. Use the Right Mat
Always use a cutting mat suitable for the material you’re working with. A proper cutting mat helps protect the blade and ensures a clean cut.
4. Adjust Cutting Pressure
Avoid using excessive cutting pressure, as it can contribute to faster blade wear and tear. Adjust the cutting pressure settings based on the material being used to minimize unnecessary stress on the blade.
5. Store Properly
When not in use, store your blades in a safe place, preferably in their original protective cases. Check the base of your Cricut machines for storage spaces, this is a perfect spot if you’re not using it to store your sweets haha. This protects them from physical damage and helps maintain their sharpness.
Replace Your Blade when:
Knowing when to replace your Cricut blade depends on various factors, such as the type and frequency of materials you’re cutting, as well as the overall performance of the blade. Here are some signs that it may be time to replace your Cricut blade:
1. Dull Cuts
After you’ve made sure that you’re on the correct cutting setting, if you notice that your Cricut machine is struggling to cut through materials or is leaving frayed edges, it could be a sign that the blade has dulled over time.
2. Increased Cutting Pressure
If you find yourself consistently adjusting your Cricut machine’s cutting pressure to achieve the desired results, it could be an indication that your blade is no longer as sharp as it should be.
3. Material Buildup
Residue from adhesive-backed materials, paper, or tiny pieces of fabric can accumulate on the blade, affecting its cutting performance. This is where you could attempt to clean it with aluminum foil, which may help, but if the buildup persists, it may be time for a new blade.
4. Unusual Noises
If you hear unusual noises during the cutting process, it could be a sign that the blade is struggling to cut through materials effectively.
5. Inconsistent Cuts
If you’re experiencing inconsistencies in your cuts, where some parts of the design are well-cut and others are not, it could be an indication that the blade is not performing uniformly.
6. Visible Damage
If you have been experiencing any of the above issues, and decide to take your blade out to investigate, notice if it shows any visible signs of damage, such as cracks or chips. If the blade is visibly damaged, it is best to replace it.